Training in clinical ultrasound:
A practice accessible to all physicians.


What if your clinical examination could go further? Clinical ultrasound provides immediate information to enrich your examination, right at the patient's bedside.

Faster and more relevant decisions. Ultrasound streamlines care and improves the patient journey right from the consultation stage.
Transform your daily practice. Clinical ultrasound refines your decisions, enhances your expertise, and revolutionizes patient care.
Step-by-step ultrasound training!
While a university degree remains a benchmark, it is not a prerequisite for getting started. Apprenticeships, private training, self-study, or academic courses: there are now many paths to choose from. Build a path that fits your schedule so you can learn ultrasound at your own pace.

“It is essential to expand the teaching of clinical ultrasound as widely as possible, and as early as possible, indication by indication. It is by practicing clinical ultrasound every day, at the patient's bedside, that one improves one's skills as an ultrasound technician.”

Many doctors wait until they have completed their training before purchasing a probe. However, the approach recommended by trainers is based on learning through daily practice. From the very first steps you take, the ultrasound scanner becomes a tool for reinforcing your technique and ensuring continuous progress.
Learning clinical ultrasound is above all a matter of practice. By handling a probe from the outset, you quickly develop your reflexes, reinforce essential techniques, and gain fluency. This direct experience promotes self-learning, without isolating you: by joining an active community of users, you never progress alone. Ultrasound thus becomes a living tool that naturally integrates into your clinical reasoning and enriches each consultation.
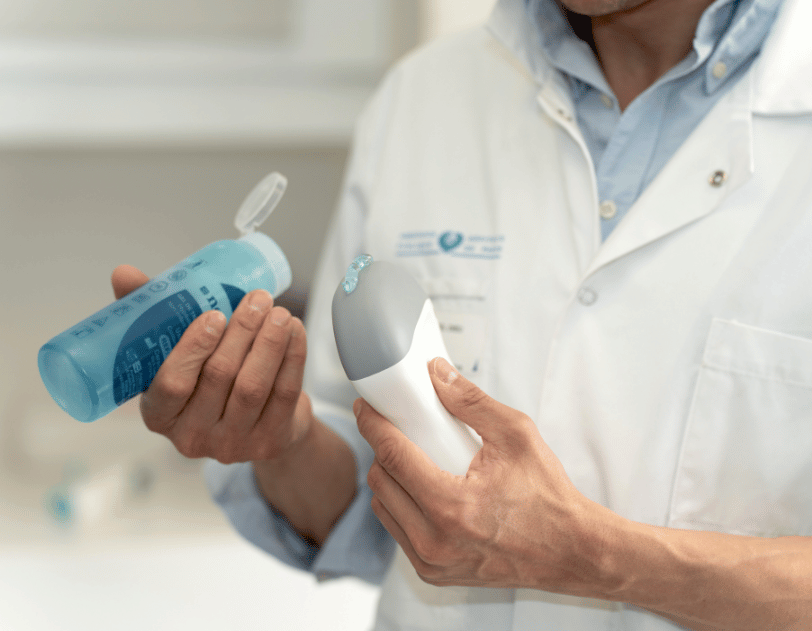
Getting the right equipment is essential for making progress. Traditional portable ultrasound machines generally cost more than €5,500 and are designed primarily for expert and advanced users. With the echOpen probe, available for €1,578, you have an affordable and suitable solution to start learning today. It is the natural starting point for integrating clinical ultrasound into your practice, without waiting or postponing the practical experience.
Performing an ultrasound scan
After just a few weeks of training, you will already be able to handle simple and common cases independently: bladder distension, pulmonary embolism, pyelocaliceal dilatation, pleural effusion. A portable ultrasound scanner such as echOpen meets the needs of these applications, accompanied by accessible and free resources. The clinical impact is immediate and tangible from your very first uses.
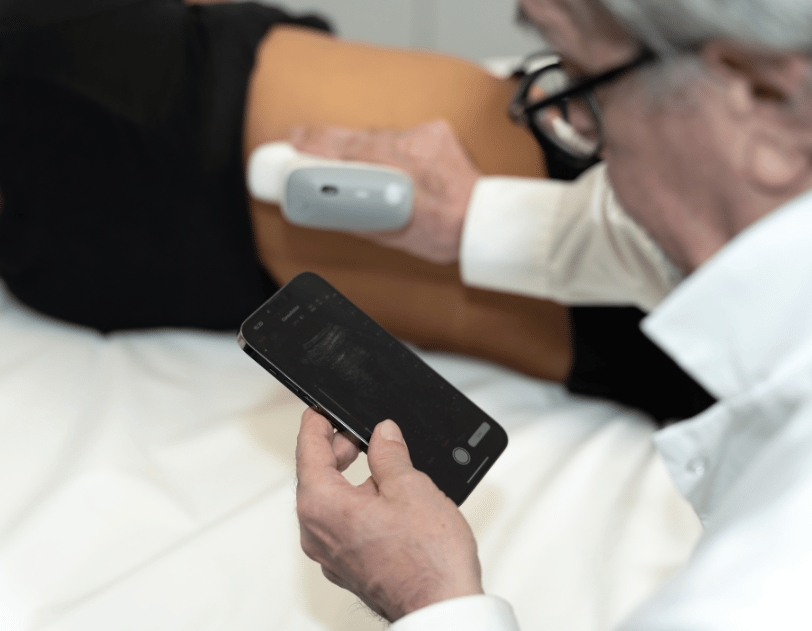
How does it work?
The simple method: 50/20/10.
50 times on yourself
You are your first model. This essential phase is dedicated to identification and anatomical learning. It allows you to develop your manipulation and visual-motor coordination skills at your own pace.
20 times on your loved ones
Step outside your own anatomy. Ask your friends and family to help you compare different body types and identify normal anatomy. This is a key step in gaining confidence and refining your image, in a context without medical implications.
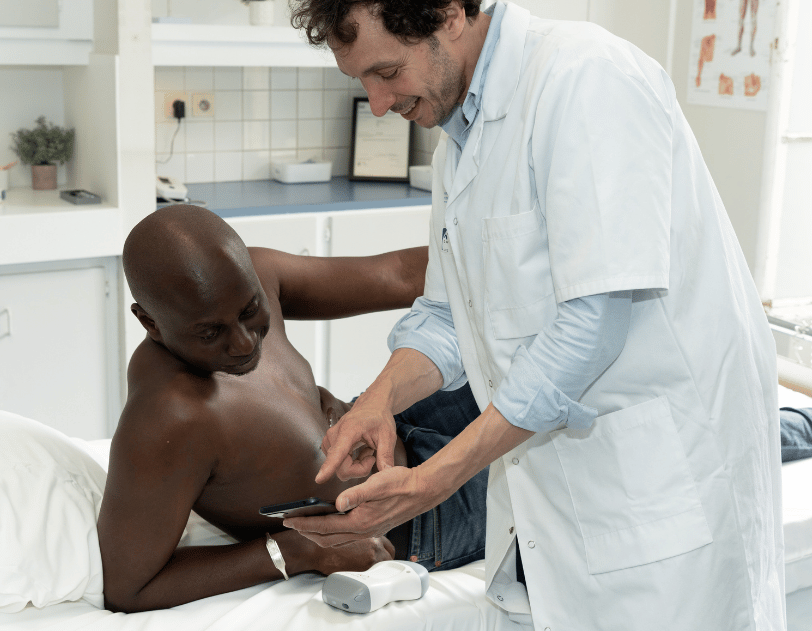
10 times on your patients
You are ready. Start incorporating ultrasound into your actual consultations on simple cases. After these first 10 examinations integrated into your clinical examination, the procedure will become natural and the diagnostic contribution will become obvious.
From the very first weeks, you will tackle simple, common cases with a high clinical impact. In three weeks, you will learn the basics through accessible formats, with an ultra-portable ultrasound machine for effective practice.
Objective
Confirm or rule out urinary retention.
Key points
- Identification of the pubic symphysis as an anatomical landmark.
- Measurement of bladder volume according to the three diameters (formula: volume ≈ L × W × H × 0.52).
- Distinction between pure liquid content and the presence of sediment or clots.
- Post-void residual urine (PVR) assessment: interpretation of "high" volume according to the clinical context.

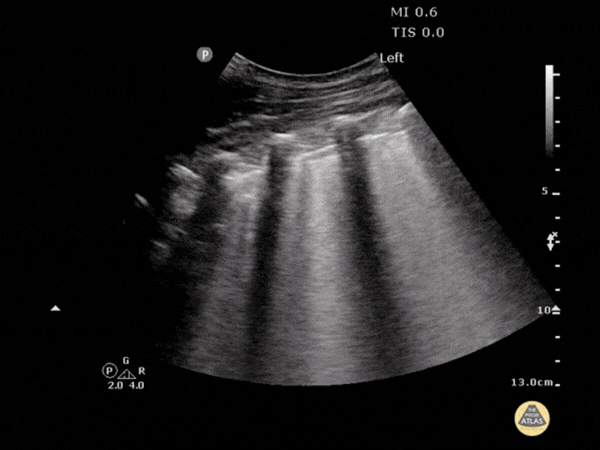
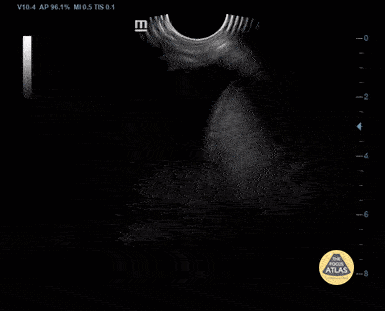
Objective
Identify and quantify diffuse interstitial syndrome. Although suggestive of acute pulmonary edema (APE) in an emergency setting, this sign must be assessed clinically to rule out other causes (pneumonia, fibrosis, ARDS, etc.).
Key points
- Recognition of "comet tail" artifacts (B lines): vertical, starting from the pleural line.
- Quantification: Presence of multiple B lines (> 3) per field, as shown in the image.
- Identification of severe forms: Coalescent B lines (white lung appearance) and disappearance of A lines.
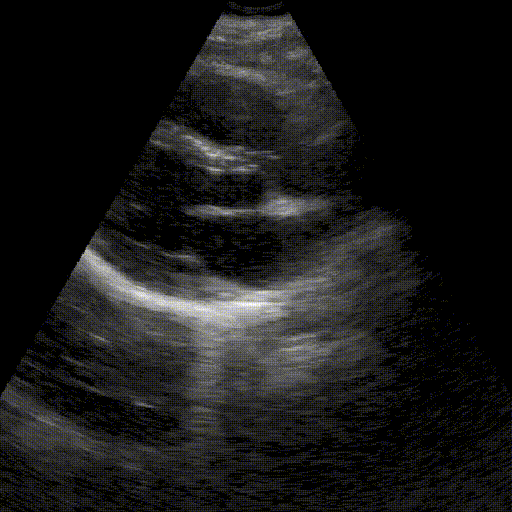
Objective
Assessment of cases of dyspnea, pulmonary infection, or heart failure.
Key points
- Identification of the diaphragm and pleural line.
- Identification of the "staircase" sign or visible spine (fluid).
- Differentiation between fluid effusion and pulmonary condensation.
- Not to be confused with: subdiaphragmatic ascites.
Objective
Search for OAP, pneumopathies, or interstitial overload.
Key points
- Identification of A lines (physiological) vs. B lines (pathological if > 3 per intercostal space).
- Scanning: 6–8 zones (or BLUE points).
- Understanding the BLUE protocol for the differential diagnosis of dyspnea.
- Detection of subpleural condensation.
.gif)
Objective
Rapid detection of free fluid, pneumothorax, or hemothorax in emergency situations.
Key points
- Scanning of the four strategic points: Morison's pouch, spleen, pelvis, and pericardium.
- Identification of pleural effusion to rule out pneumothorax.
- Mastery of ergonomics in stressful or emergency situations.
Objective
Check whether the upper urinary tract is obstructed (renal colic).
Key points:
- Identification of renal lobes in longitudinal and transverse sections.
- Differentiation between the hyperechoic renal sinus and the parenchyma.
- Identification of anechoicity in dilated calyces and renal pelvis.
- Systematic comparison with the contralateral kidney.
- Warning about pitfalls: extra-renal pelvis or parapelvic cysts (differential diagnoses).
.gif)
Objective
Screening and monitoring of abdominal aortic aneurysms.
Key points
- Visualization of the aorta from the epigastric region to the iliac bifurcation.
- Technique: transverse first, then longitudinal; gentle pressure to expel gas.
- Accurate measurement of the anteroposterior diameter from wall to wall.
- Identification of a mural thrombus or aneurysmal dilation.
Typical initiation schedule
Getting started
First landmarks
Consolidation
Practical application
The most important thing: get equipped!
Order a probeTo go further...
The essentials of clinical ultrasound are readily accessible and cover most situations encountered in general medicine. More complex cases require a step-by-step approach, to be considered at a later stage.
Technical and advanced cases are part of a longer progression, with dedicated training and specialized equipment. They represent a further step toward expertise.
Objective
Screening for ectopic pregnancy, hemoperitoneum, or evaluation of acute abdominal pain.
Key points
- Detailed exploration of the posterior recesses (Douglas' cul-de-sac in women).
- Search for free fluid between the digestive loops.
- Be vigilant about false positives (vessels, ileal loops).
Objective
Screening for deep vein thrombosis (DVT) in cases of swollen or painful legs (suspected phlebitis).
Key points
- Mastery of the compressibility test: a vein that does not collapse under the probe = positive sign of thrombus (CUS).
- "2-point" or "3-point" protocol: targeted exploration of the common femoral and popliteal veins.
- Differentiation between arteries (pulsatile/round) and veins (compressible/oval) to avoid false positives.
.gif)
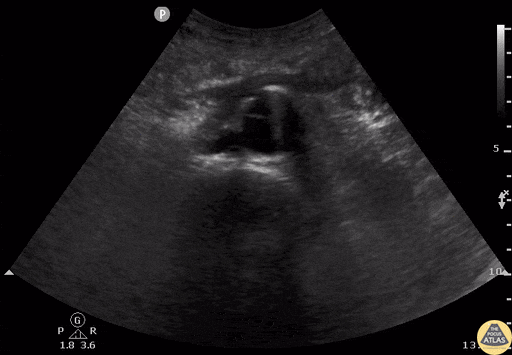
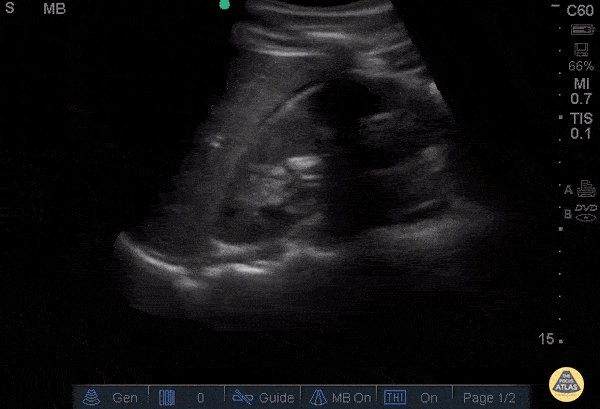
Objective
Assessment of severe dyspnea, suspected tamponade, or shock.
Key points
- Use of the subcostal window (the liver serving as an acoustic window).
- Distinction between epicardial fat and true fluid effusion.
- Observation of the impact on the filling of straight cavities.
.gif)
Your roadmap: Where to start?
Clinical ultrasound is learned through repetition. To move from theory to your first diagnoses in just a few weeks, here are the key steps to structure your learning.
1️⃣ Get a portable ultrasound machine from day one
The most important thing for learning is to have your own equipment right away. Don't wait until the end of a theoretical course to get equipped.
- Learning by doing: It is through daily practice at the patient's bedside that one truly improves one's skills.
- Gestural anchoring: Having your probe within easy reach allows you to integrate ultrasound gestures as a natural extension of the stethoscope from your very first consultations.
- An affordable investment: The echOpen probe, priced at €980 excluding tax, is designed as the ideal tool for beginners, offering a solution that is 2.5 times cheaper than the market average.
2️⃣ Apply the "50/20/10" method
Once equipped, do not immediately look for complex pathologies. Train your eye and your hand by repeating the procedure on healthy structures:
- 50 times on yourself to memorize normal anatomy and adjustments.
- 20 times on your loved ones to adapt to different body types.
- 10 times on patients to validate your skills in real-life situations and gain confidence.
3️⃣ Rely on the echOpen ecosystem
You don't learn alone; we provide you with the resources you need to ensure your progress and deepen your skills.
- Clinical library: Consult our theoretical reference articles and practical fact sheets to consolidate your knowledge.
- Interactive webinars: Watch our themed sessions and interactive clinical case analyses (Staff Echo Clinique) to sharpen your diagnostic skills.
- Certification training: Consult our 2026 training calendar to find CPD courses offered by our partners.
echOpen an ecosystem designed to support your success
At echOpen, we offer you much more than just a probe: we support you on a daily basis as you develop your skills. Our goal is to enhance your membership in an active community while ensuring your practice is safe thanks to expert resources.

.png)
A probe starting at €1,460 to get started!
An investment that is half the market price to start using ultrasound today.

FAQ
Clinical ultrasound in general practice
What degree do you need to perform ultrasounds?
In France, ultrasounds may be performed by physicians, provided they can demonstrate that they have undergone specific training, even without a mandatory state-issued diploma.
Who is authorized to perform an ultrasound?
Ultrasound procedures are reserved for trained healthcare professionals, in a medical and regulated setting.
Can I quote for an ultrasound scan?
A physician may bill for an ultrasound when performing an imaging procedure that meets the criteria of the official nomenclature (CCAM), using dedicated codes such as ZCQM008 (abdominal ultrasound) or GFQM001 (thoracic ultrasound). This billing is his responsibility and requires appropriate training and a written report. In practice, clinical ultrasound can also be used as an extension of the clinical examination, without being systematically billed as a separate imaging procedure.
How long does it take to train in clinical ultrasound?
Clinical ultrasound is learned gradually, starting with simple and common use cases. With a few weeks of focused and repeated practice, it is possible to become proficient in common clinical applications. Skills are then developed step by step, depending on the chosen clinical applications.